This is part of a blog series where I will illustrate how you can easily reproduce any feature offered by today’s marketing automation services using Zenaton — and all it takes is one developer.
As you probably know, a welcome email series is an email marketing sequence that someone automatically gets when they first sign up for your service. There is no lack of articles explaining why this is a good practice and how to craft these emails, so I only want to focus here on how to implement such a series from a developer’s point of view.
Specs
Usually, the specs are as simple as:
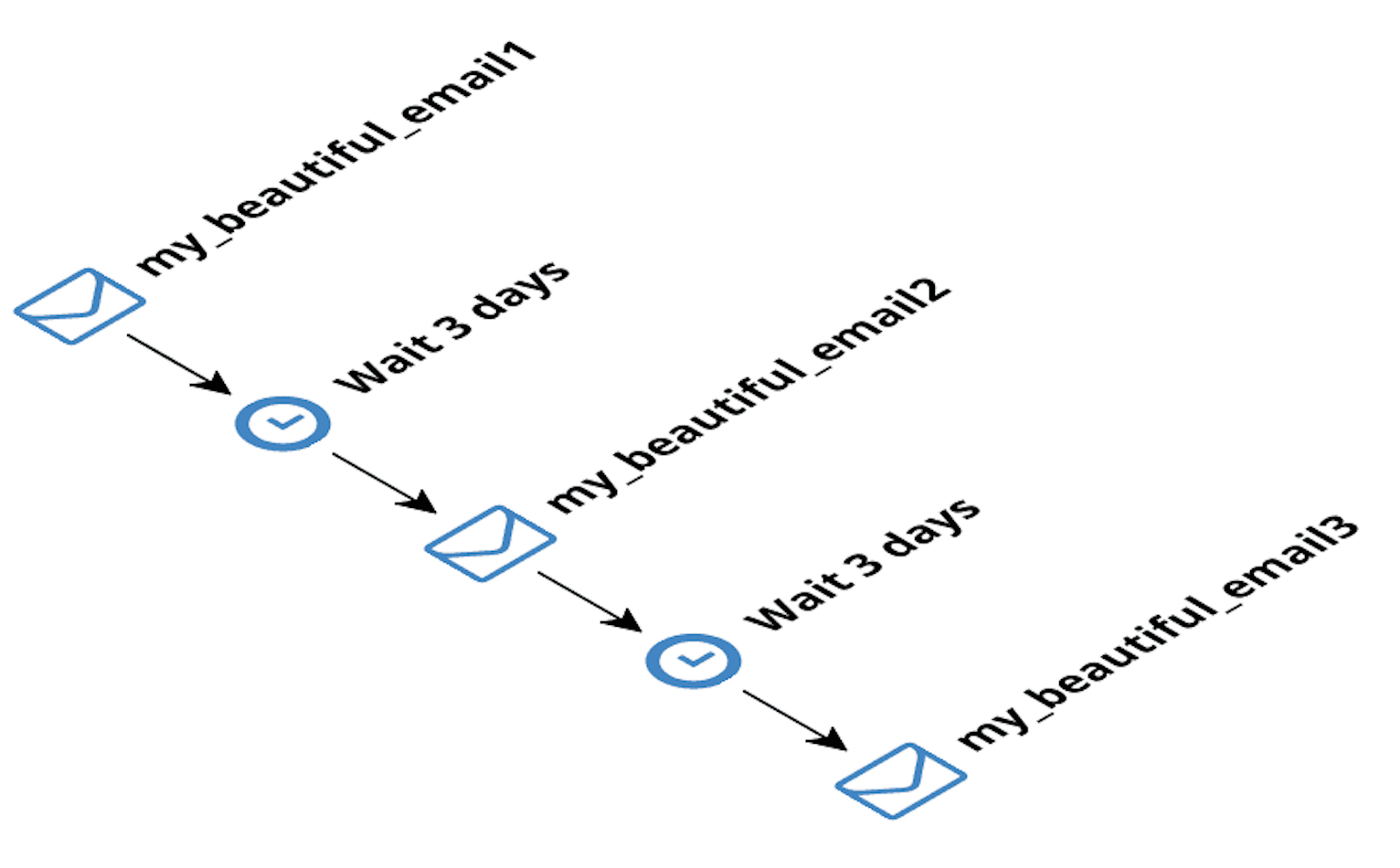
When a user subscribes, send “my_beautiful_email1”, then wait 3 days, then send “my_beautiful_email2”, then wait 3 days again and finally send “my_beautiful_email3”

Of course the interval could be 1 day, or 7 days, or whatever, and the number of emails depends on your CMO’s resilience and imagination.
The current way
As a developer, there are many ways to approach this problem, such as:
- setup a new column
registered_atin your tableusers(that will contain the date and time of registration, as you may have guessed) - setup a task scheduler (such as cron) to execute a task every minute
- this task will send a request to the database every minute to check if a user just registered, registered 3 days ago, 6 days ago… and send them the proper emails.
This approach already needs a lot of work and is error-prone due to a lot of date manipulation and sql requests (to mitigate this, you can pre-calculate the sending date and time and store them in a database, but now you’ve added a burden to your database model). A simplified version of this would launch the first email upon registration and the others at fixed hours (such as 9am).
Some other implementations are possible, like using a task queuing system that allows for delayed tasks: this way you can try to send all emails with adequate delays upon registration. But usually, those systems do not allow for longer delays such as a month, and it’s usually difficult, if not impossible, to delete message once they are queued.
All this just for sending a few emails. It should be simpler, and it can be.
The Zenaton way
The following examples are presented in node.js, but are similar in other languages supported by Zenaton.
First implementation
Using the Zenaton node library, the previous welcome email series can be coded in a WelcomeEmailSerie class as:
var { Workflow, Wait } = require("zenaton");
var SendMyBeautfulEmail1 = require("./SendMyBeautfulEmail1");
var SendMyBeautfulEmail2 = require("./SendMyBeautfulEmail2");
var SendMyBeautfulEmail3 = require("./SendMyBeautfulEmail3");

module.exports = Workflow("WelcomeEmailSerie", function() {
    new SendMyBeautfulEmail1(this.email).execute();
    new Wait().days(3).execute();
    new SendMyBeautfulEmail2(this.email).execute()
    new Wait().days(3).execute();
    new SendMyBeautfulEmail3(this.email).execute();
});
And… that’s all you need! Since this workflow is really easy to read, I won’t comment on it line by line, but if you want more details, please read the documentation.
The workflow can be started by this simple command, usually through your web app:
new WelcomeEmailSerie(user).dispatch()Of course, as above you still have to compose the emails and code the SendBeautilEmail1, 2 and 3tasks, but you don’t have to worry about the orchestration of tasks, as Zenaton handles that for you based on your WelcomeEmailSerie.js class (how it works).
Second implementation
Now, let’s suppose you decide after a while that all emails (except the first one) should be sent on Monday at 8am. Zenaton provides an elegant way not to worry about all those users that are currently in the middle of the welcome email series by applying the new workflow version to new instances only. It’s as easy as:
- rename
WelcomeEmailSerieasWelcomeEmailSerie_v0 - create the new implementation
WelcomeEmailSerie_v1
var { Workflow, Wait } = require("zenaton");
var SendMyBeautfulEmail1 = require("./SendMyBeautfulEmail1");
var SendMyBeautfulEmail2 = require("./SendMyBeautfulEmail2");
var SendMyBeautfulEmail3 = require("./SendMyBeautfulEmail3");

module.exports = Workflow("WelcomeEmailSerie_v1", function() {
    new SendMyBeautfulEmail1(this.email).execute();
    new Wait().monday().at('08:00').execute();
    new SendMyBeautfulEmail2(this.email).execute()
    new Wait().monday().at('08:00').execute();
    new SendMyBeautfulEmail3(this.email).execute();
});- create a reference
WelcomeEmailSeriewhere you will list all running versions:
var { Version } = require("zenaton");
var WelcomeEmailSerie_v0 = require("./WelcomeEmailSerie_v0");
var WelcomeEmailSerie_v1 = require("./WelcomeEmailSerie_v1");

module.exports = Version("WelcomeEmailSerie", [
  WelcomeEmailSerie_v0,
  WelcomeEmailSerie_v1
]);
And that’s all you need to do to have the new workflow up and running.
Third implementation
Now, let’s suppose that after a while your CMO decides that if the user is not activated, then this email series should continue. Then your workflow becomes:
var { Workflow, Wait } = require("zenaton");
var SendMyBeautfulEmail1 = require("./SendMyBeautfulEmail1");
var SendMyBeautfulEmail2 = require("./SendMyBeautfulEmail2");
var SendMyBeautfulEmail3 = require("./SendMyBeautfulEmail3");
var SendMyBeautfulEmail4 = require("./SendMyBeautfulEmail4");
var SendMyBeautfulEmail5 = require("./SendMyBeautfulEmail5");
var SendMyBeautfulEmail6 = require("./SendMyBeautfulEmail6");

module.exports = Workflow("WelcomeEmailSerie_v2", {
  handle() {
      new SendMyBeautfulEmail1(this.email).execute();
      new Wait().monday().at('08:00').execute();
      new SendMyBeautfulEmail2(this.email).execute()
      new Wait().monday().at('08:00').execute();
      new SendMyBeautfulEmail3(this.email).execute();
      new Wait().monday().at('08:00').execute();
      if (! this.activated) {
        new SendMyBeautfulEmail4(this.email).execute();
        new Wait().monday().at('08:00').execute();
        new SendMyBeautfulEmail5(this.email).execute();
        new Wait().monday().at('08:00').execute();
        new SendMyBeautfulEmail6(this.email).execute();
      }
  },
  onEvent(name) {
    if (name == "UserActivatedEvent") {
      this.activated = true;
  },
  id() {
    return this.email;
  }
});
In order to not to worry about current running workflows, don’t forget to register it into WelcomeEmailSerie:
var { Version } = require("zenaton");
var WelcomeEmailSerie_v0 = require("./WelcomeEmailSerie_v0");
var WelcomeEmailSerie_v1 = require("./WelcomeEmailSerie_v1");
var WelcomeEmailSerie_v2 = require("./WelcomeEmailSerie_v2");

module.exports = Version("WelcomeEmailSerie", [
  WelcomeEmailSerie_v0,
  WelcomeEmailSerie_v1,
  WelcomeEmailSerie_v2
]);
When a user is activated, your web app just has to send an event to the WelcomeEmailSerie workflow of this user:
WelcomeEmailSerie.whereId(user.email).send(“UserActivatedEvent”);Conclusion
This example illustrates just how easy it is to implement a welcome email series with Zenaton. Even more importantly, it’s really easy to update it according to your needs. Using Zenaton over a marketing automation service gives you complete flexibility about what you want to do: being close to your web app and your database, you can easily fine tune your workflows according to what your users are doing.
Zenaton is for technical teams that understand that their primary mission is to improve the business through quick iterations and new ideas, not spending most of their time solving purely technical issues. If you have additional questions, feel free to contact me at gilles at zenaton.com or to ask them below 👇
